Buy Generic Medications. Great Discounts. Free Shipping. Visit Our Online Store. Online Without Prescription. Every Person May Order Actual From The Drug Store From Home Right Here http://tsod.com/where-to-buy-renova-online/ Simply. With Great Discount. I Bought It There With No Prescription.
Alla webbplatsbesökare är det möjligt att få ett pålitligt läkemedel mot sexuell maktlöshet i apoteket hemifrån här Viagra naturligtvis… Du behöver inte besöka läkaren och få ett recept. Den bästa tjänsten på webben. De vanligaste bieffekterna av Viagra är huvudvärk, rodnad i ansiktet, matsmältningsbesvär Mindre vanliga biverkningar, som till exempel: kränkning av färgseende (såsom oförmåga att skilja på blå och gröna föremål eller vision av alla föremål med en nyans av blå), känsligheten för ögonen att lysa; dimsyn; hjärtklappning; nästäppa; magbesvär viagra.
The Very Best Pharmacy Store On The Web. Accredited Canadian Pharmacy That Provides Safe
Greatest Top Quality And Extra Low Costs. Fda Authorized Drugs. Canadian Overall Health Inc. Anybody Can Locate Expense-cost-free Inside The Pharmacy At Property Under my latest blog post Easily. You Really Don’t Need To Have A Prescription To Acquire The Pills. Reward 10 Cost-free Pills I Ve Obtained With My Get.
Absolute Privatsphäre. Online Ohne Rezept. Bestellen Sie Jetzt Im Internet. Jeder Kunde Muss Sich Auf Dieser Website see it here Nur Kostenlos Von Der Frankfurter Am Main Drogerie Von Ihrem Wohnort Aus Auffinden. Mit Fantastischen Niedrigen Kosten. Freundliche Hilfe Und Ideale Angebote Für Alle Besucher.
Någon som kan köpa billig droghjälp för penis från apoteket från ditt hem under helt enkelt. Du behöver inte besöka läkaren och få recept. Frakt över natten. Dess främsta fördelar är att dess effektivitet är fortfarande upp till 36 timmar efter intag av det, men det har kanske viktigaste är att erektion visum endast med sexuell upphetsning, det vill säga att du kan ta p-piller på morgonen och har en perfekt sexuell aktivitet under eftermiddagen eller kvällen Av dessa skäl, Cialis är en av de mest populära behandlingarna för Erektil Dysfunktion Det räcker med att säga att nästan alla män som har upplevt sin talan personligen säga att det är ett läkemedel som mycket effektivt och utan betydande biverkningar viking-med.com/kopa-cialis.html .
While I would love to rush in and get the engine running and the car mobile, I have been advised that that might not be the best strategy. The logic goes, why waste money on the mechanics if the car’s basic structure is unsound. While I’m pretty comfortable that I have a good idea that body and metalwork is in good shape, for a car of its age, I agree that I should spend some time and energies in digging a little deeper into the structure and guarantee that my first impressions are correct. (Plus, the interior is in such bad shape that it will have to be stripped out anyway, so I’m not really wasting my time and efforts).
With the above logic in mind, I fired up my kerosene heater and set about methodically stripping out the driver’s side interior. At 150K BTU, it warms up the large two car garage quite nicely from 20 to 75 in about 20 minutes. (WARNING: Always use a kerosene heater in a properly ventilated area. I open my garage door 18″-24″ and stick it out half way when using it). I first set about removing the driver’s seat, that came out like a charm, as I had coated the tracks and floor bolts with KROIL before I had left the garage previously. If you are working on any old and rusted car, I highly recommend getting several cans of this stuff. While penetrants like PB Blaster are good, KROIL takes it to a whole new level. It’s known as “the oil the creeps” and while I’m not sure the how or why it works, it unsticks rusty parts like nothing else. If possible, coat whatever rusty nuts, bolts or screws you will want to work on and let it sit for a while as you work in other areas. When you come back, you’ll be amazed at how it’s worked its magic. Suddenly, parts that were previously a solid mass are now workable and free.
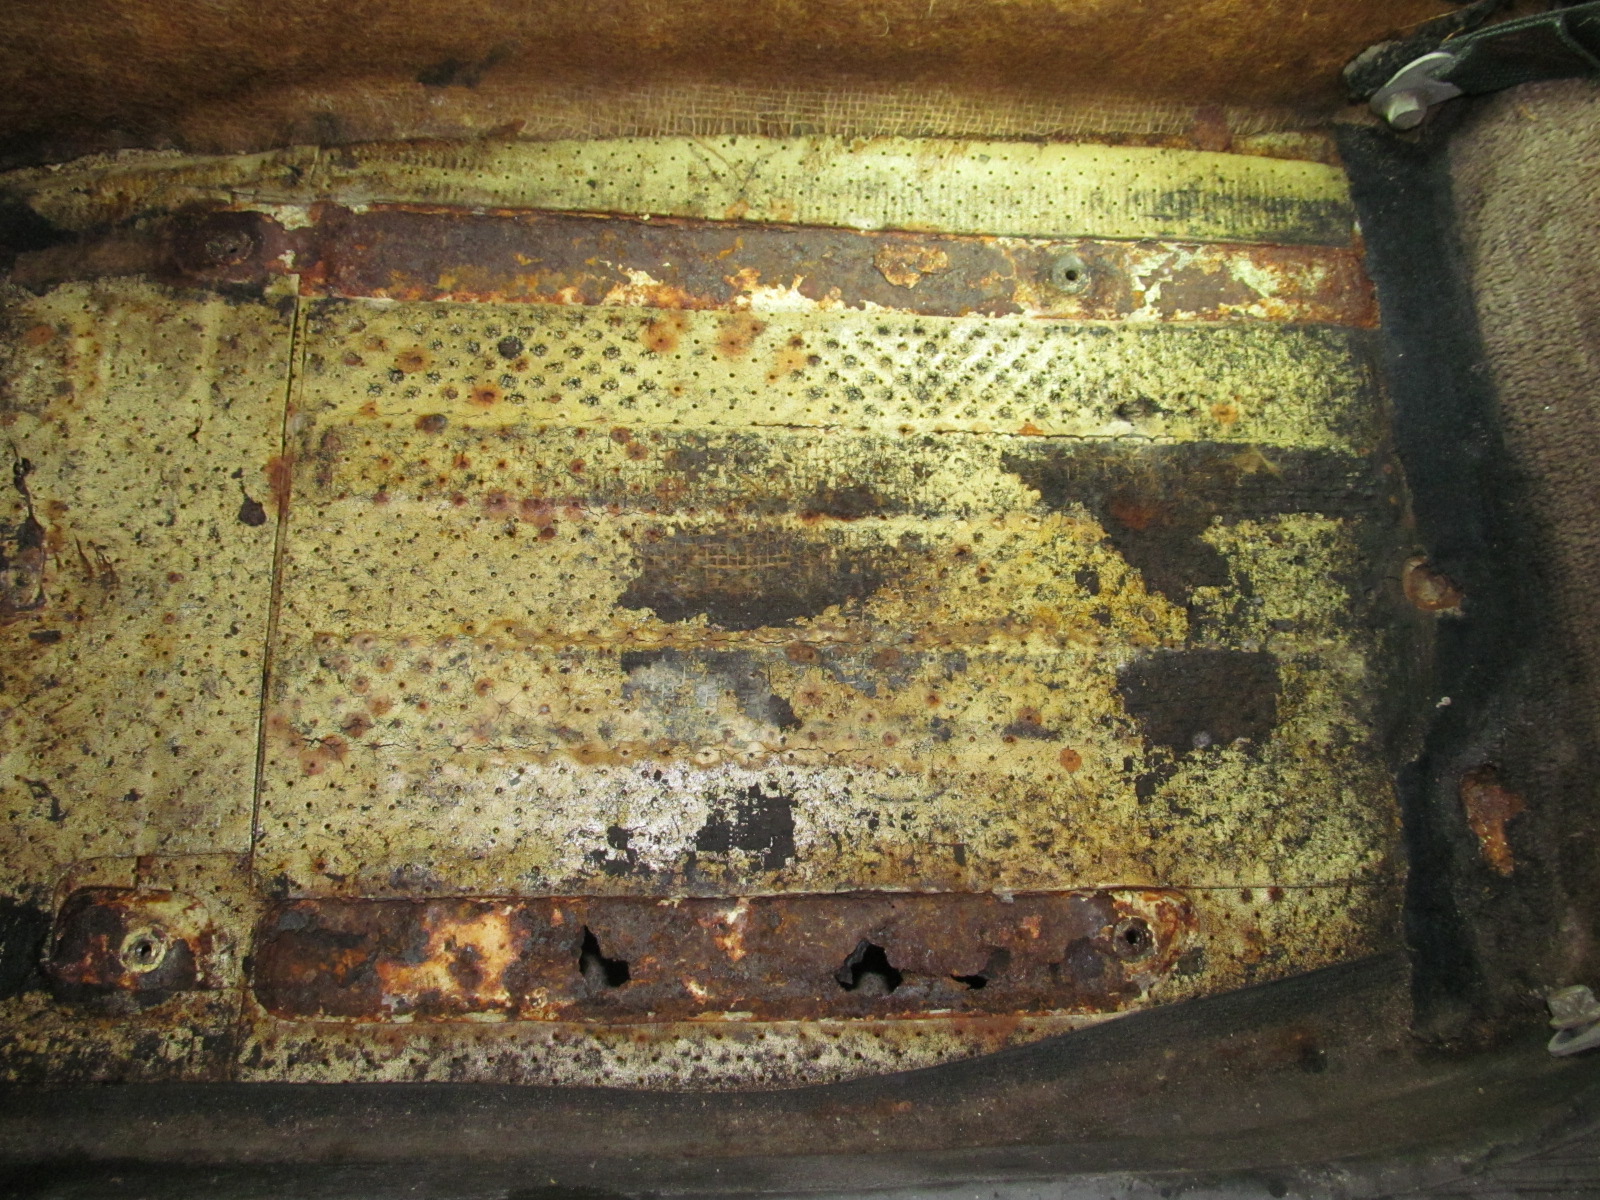
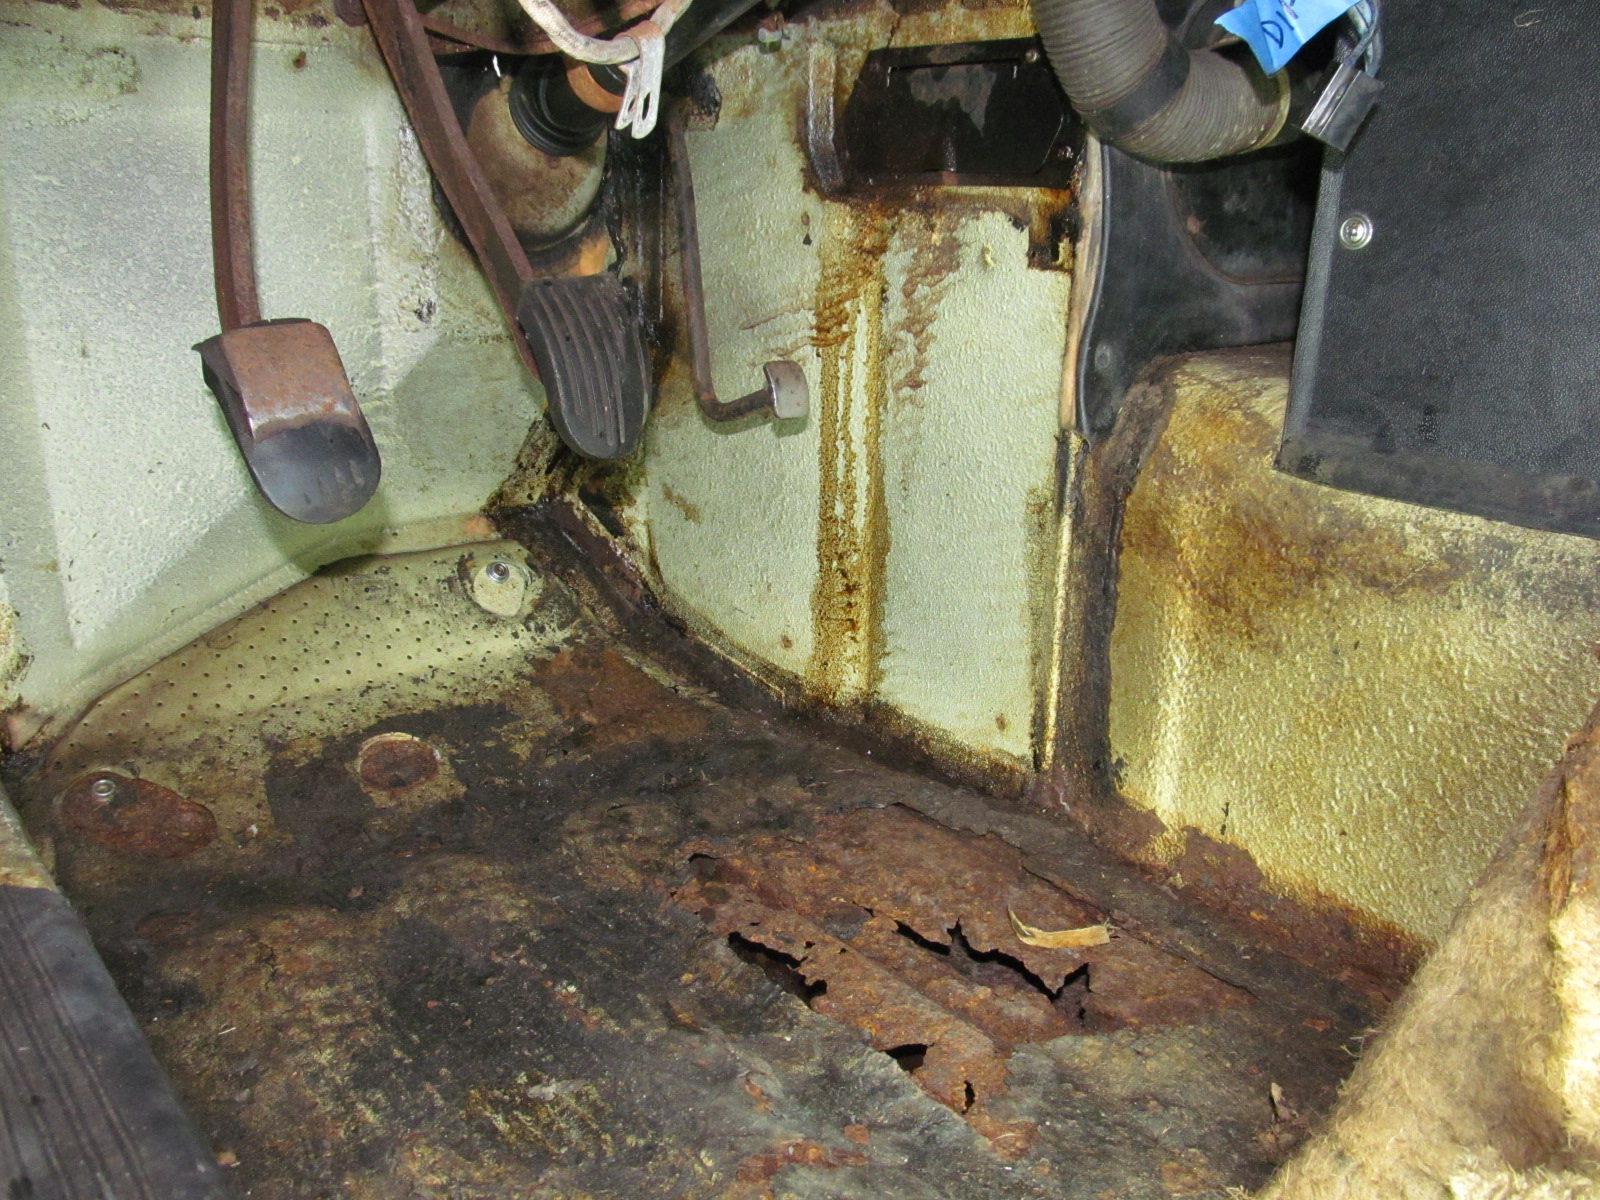
Now that the seat was out, I had free access to the entire driver’s floor and stripped out the old rubber mat to get at the floor underneath. While it has some rot and holes in it, it was no where nearly as bad as the front section on the footwell. I’ll go at it a little more aggressively with a hammer and screwdriver, but it initially looks that it just might be salvageable without much efforts and the need to replace the entire floor.
I then wanted to remove the rubber cladding along the side rail, but needed to first remove the aluminium strip along the bottom edge of the door opening. This was easier said than done, because the screws were totally rusted and one with the side rail. A little KROIL and some tapping with a hammer did nothing this time and I was afraid that I was going to strip out the old, rusty heads if I tried to put too much pressure on them. That would mean that I’d have to drill them out then, and that’s not what I wanted to do unless absolutely necessary. I soaked them in more KROIL and tapped them again with a hammer, then left them along to soak.
I next focused my attention on stripping out the remaining carpet and panels in the wheel well. While those screws were a pain to get at and looked bad, they all came out eventually and with just a little persuasion. I was pleased to see that the body panels underneath them looked sound and in good condition.
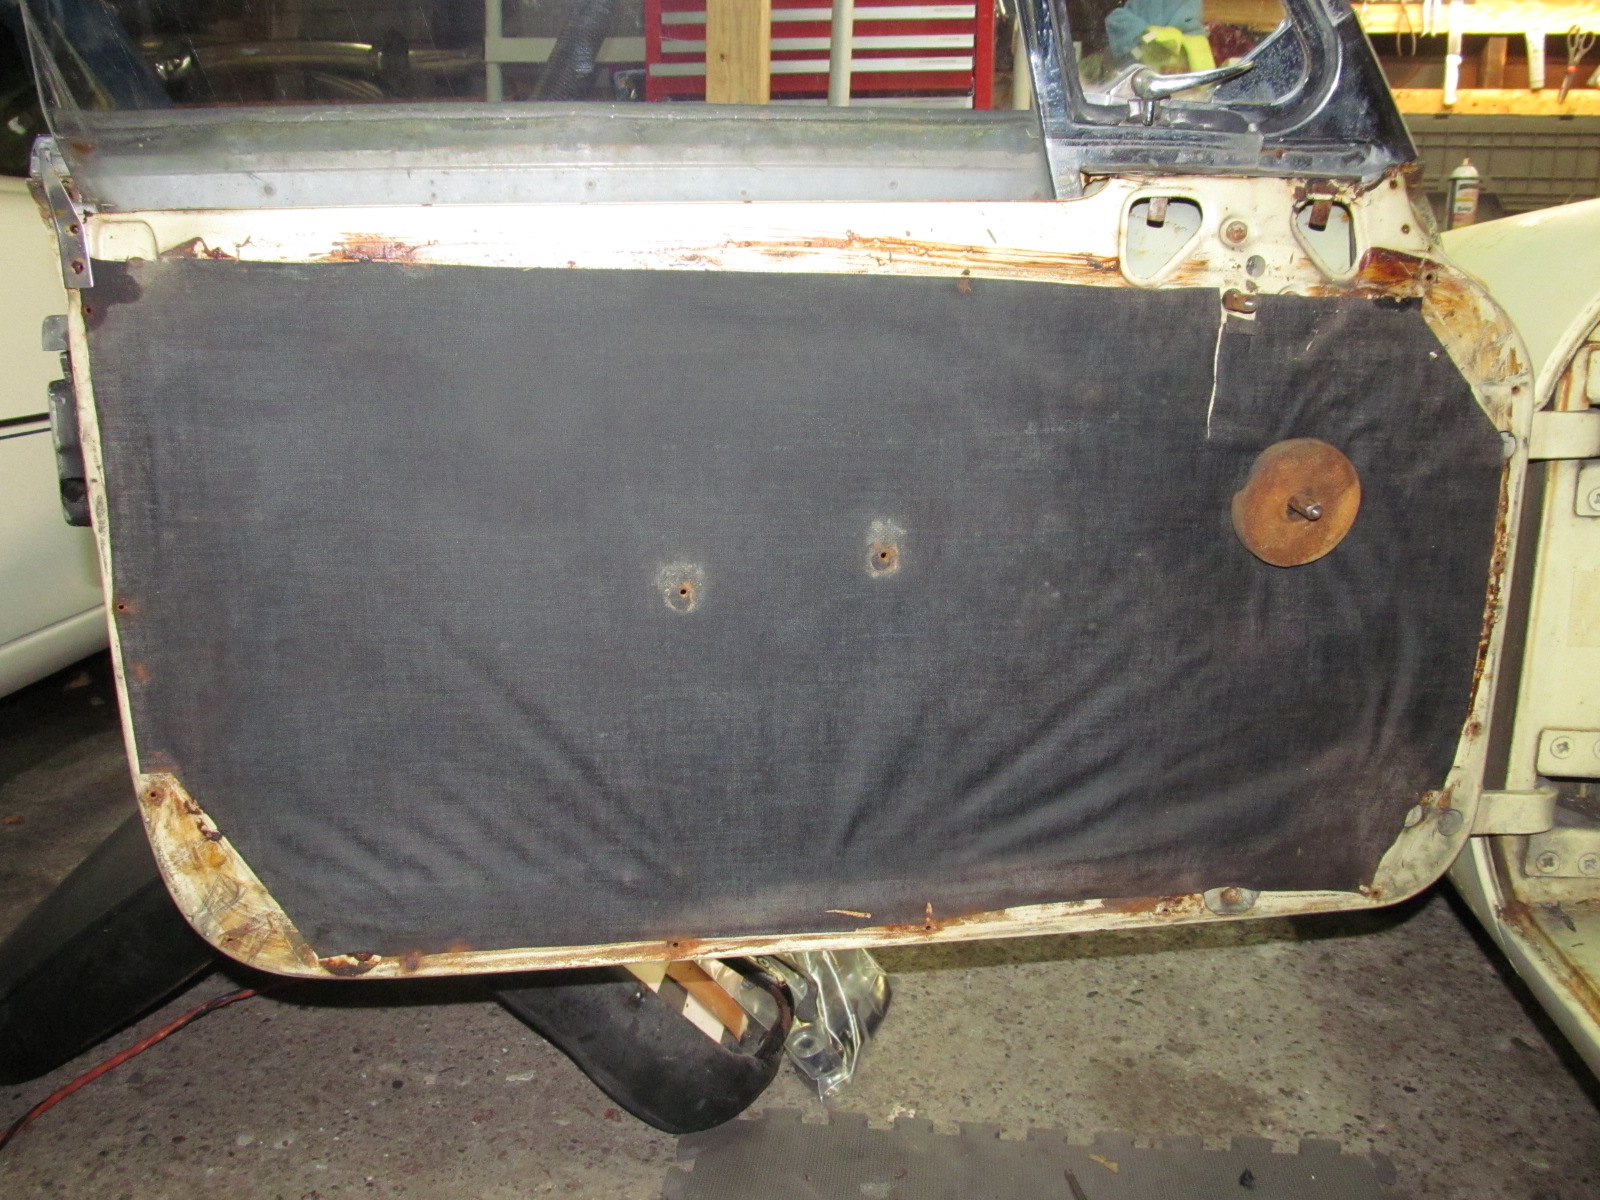
I next focused on the driver’s door. I was concerned as the window mechanism was frozen solid and might have been damaged when the door was pushed in. I carefully took off the door cap, that was in good condition and was only going to need a little cleaning and polishing to be reusable. Next I took off the door handles and unscrewed the door card panel. Most of the screws came right out, despite their bad condition. The panel on the bottom was in poor condition and it just pulled away from the rusted screws. While I expected to see a plastic liner behind the door card, I found that the factory had actually used black vinyl as the water barrier. They had simply turned the finished side towards the door and glued in on. (The fabric side was facing out). While this vinyl was very fragile, I was able to remove it in one piece and will save and use it as a template for the new plastic barrier that will be replaced once the door is refinished.
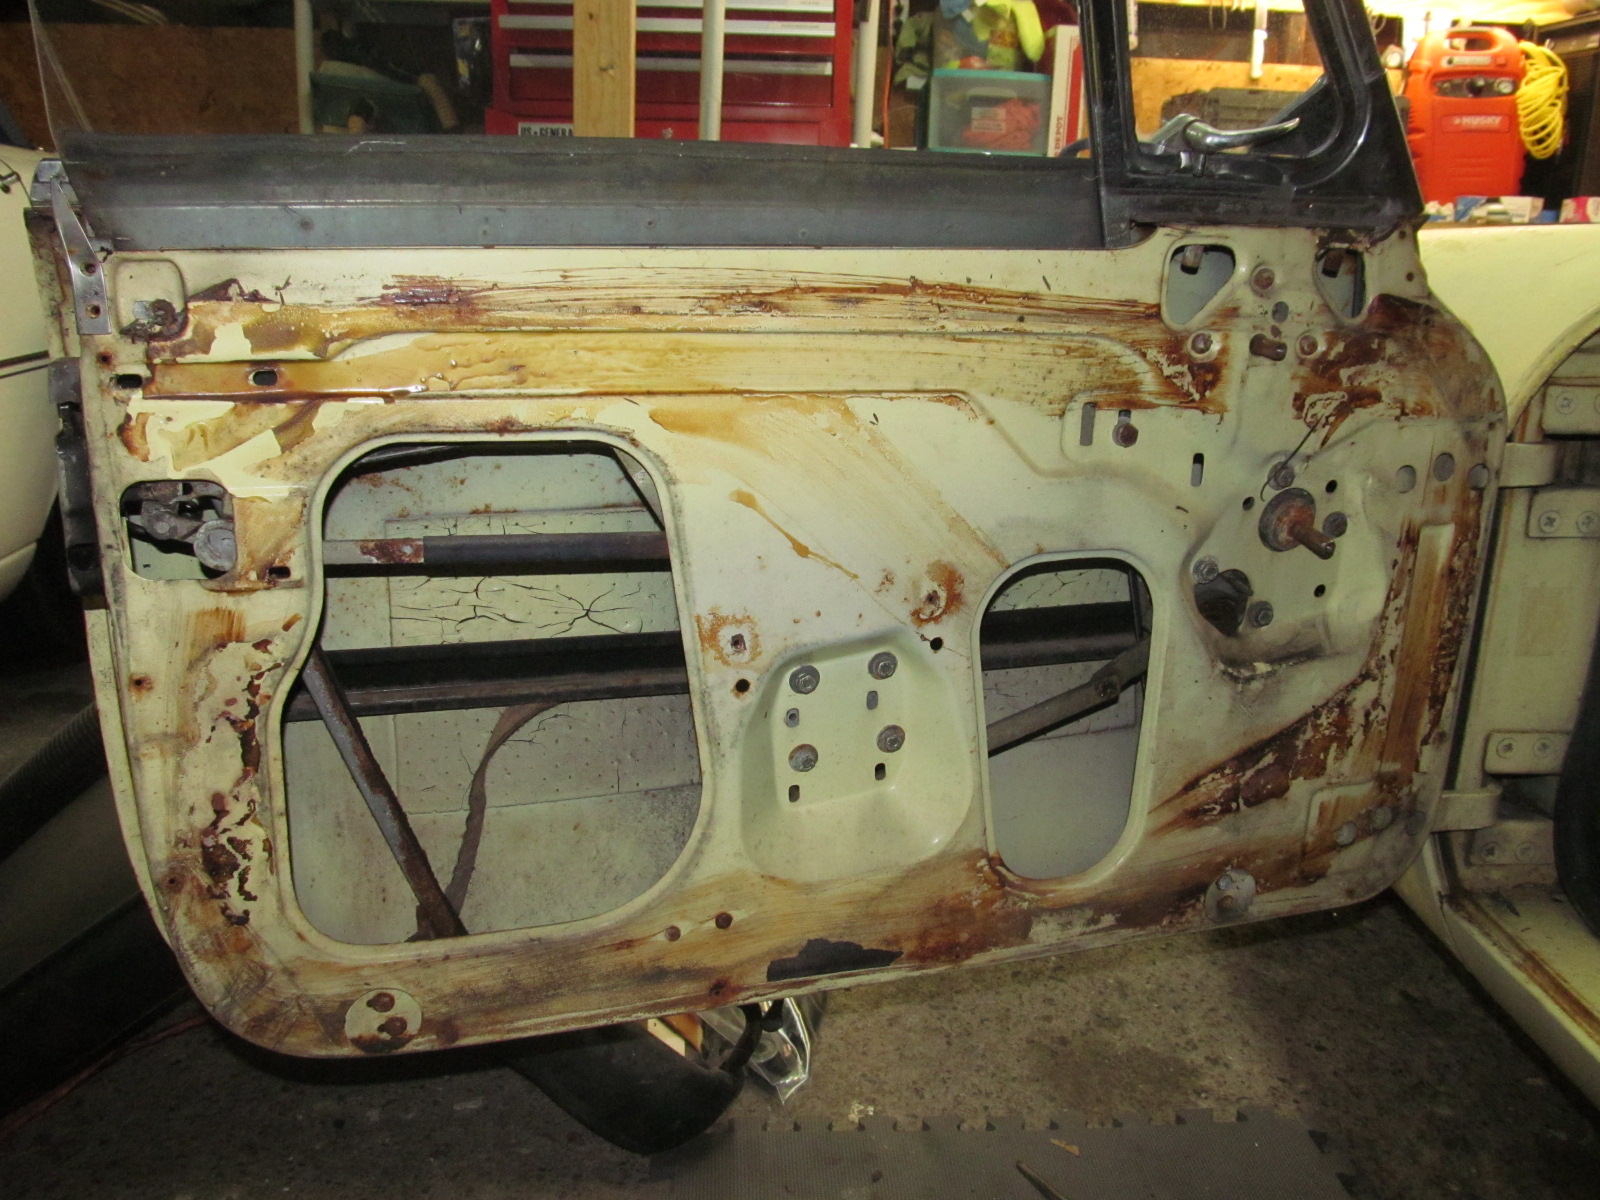
With the door panel stripped off and the mechanisms accessible, I liberally soaked everything I could reach with the KROIL. Once again, it worked its magic and with the help of some additional leverage of large vise grips, I was able to work the window mechanism back and forth until it ran smoothly again. I was happy for this, as I had feared the winder had been damaged, but the outside skin was not interfering at all. I was also happy to see that the inside and bottom of the door was in great shape. So many MGB doors rot out on the bottom edge and from the inside. My plans are that once the door is fixed, painted and rehung, I will put a layer of DynoMat in and then spray the entire inside with undercoating, with particular attention to the bottom seams. (Don’t forget to be sure the drain holes are free after applying undercoating)!
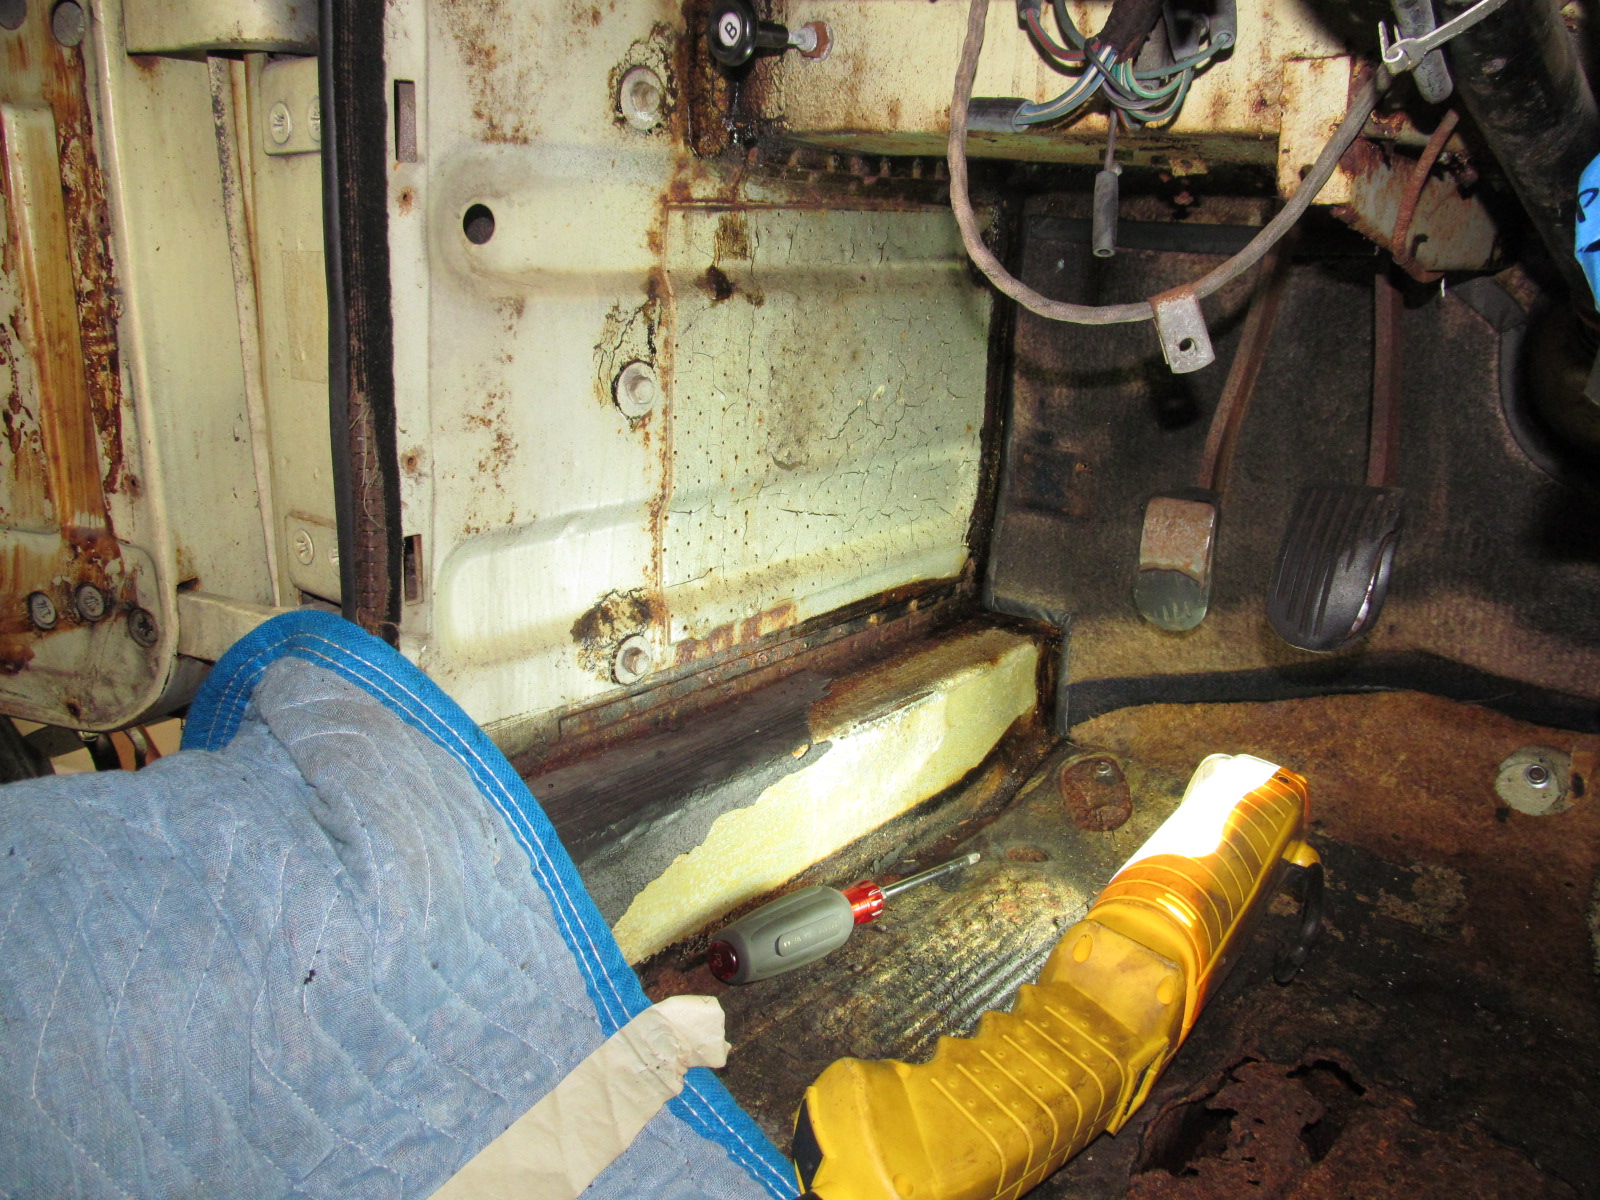
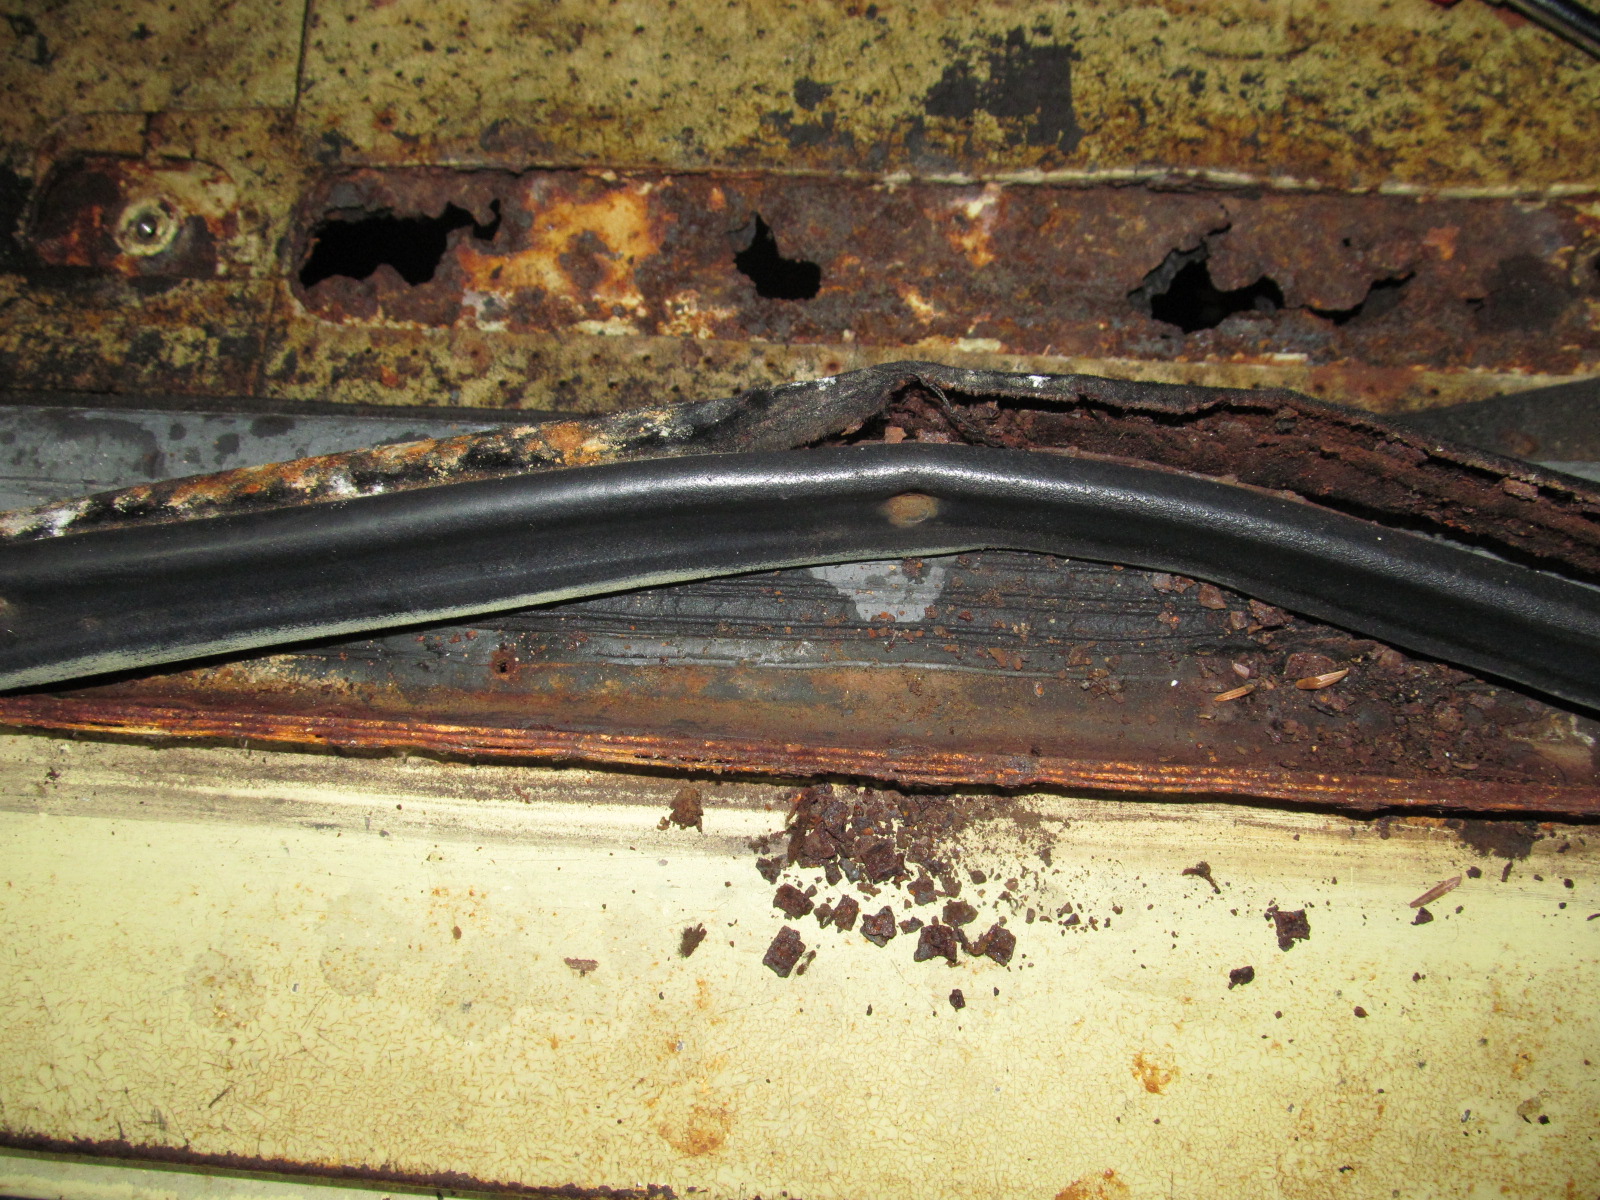
I was just about finished for the day, but went back to the screws on the threshold plate that I had previously treated. I ran down the entire set again and tapped them with a hammer and screwdriver. I said a little prayer and then tried them again, putting as much weight as I could on the screwdriver so as not to strip the head slots. Wonder of wonders, all of the screws came out! KROIL to the rescue again! (I think I’m gonna buy stock in the company). After all the screws were removed, and the plate came off, I peeled back the rubber gasket and it just disintegrated into a pile of rust, rubber and fabric in my hand. While this was disturbing to see, I was happy to see that the threshold seam and metal surrounding it seemed pretty intact. The rust I was seeing was from the deteriorating gasket and not the metal bodywork. This is another good sign that my initial impressions about the conditions of the bodywork were correct.
Time to clean up and head for home. Before I did, however, I did two things. First, I went to the passenger’s side and sprayed down the threshold plate screws and the seat mounting bolts and rails. The second was I gathered up all my removed bits and pieces, bagging and labeling EVERYTHING. This is absolutely essential to insure a successful restoration. I cannot stress this enough to anyone considering any work on their LBC. While it takes extra time and some organization to do this now, the benefits will be obvious and welcome when the time comes to put the car back together again. I save every old part, screw, nut and bolt. They are put in individual zip lock style baggies and labeled. Why keep old, rusted and obviously useless parts you ask? The answer is simple and multifold. First, saving and labeling everything will save time and aggravation when you go to put things back together one, two or more years from now. While we all have the best intentions, projects get sidetracked and memories become fuzzy over time. If everything is neatly bagged and religiously labeled it will be less of a challenge to go back and start where you left off. Also, by saving everything, even parts that you know you are going to replace, you will be able to use the originals as temporary pieces, templates to make new/unavailable parts and have the original hardware to match when ordering new screws, nuts, etc. This last is important, as many of the sizes are unique and having the original will insure the proper size is ordered and that it will go back in without a struggle and the frustration of using the wrong hardware. Also, consider replacing old screws, nuts and bolts with stainless steel. (Unless you are doing a 100% concours, original car). They won’t rust and will look great for years.

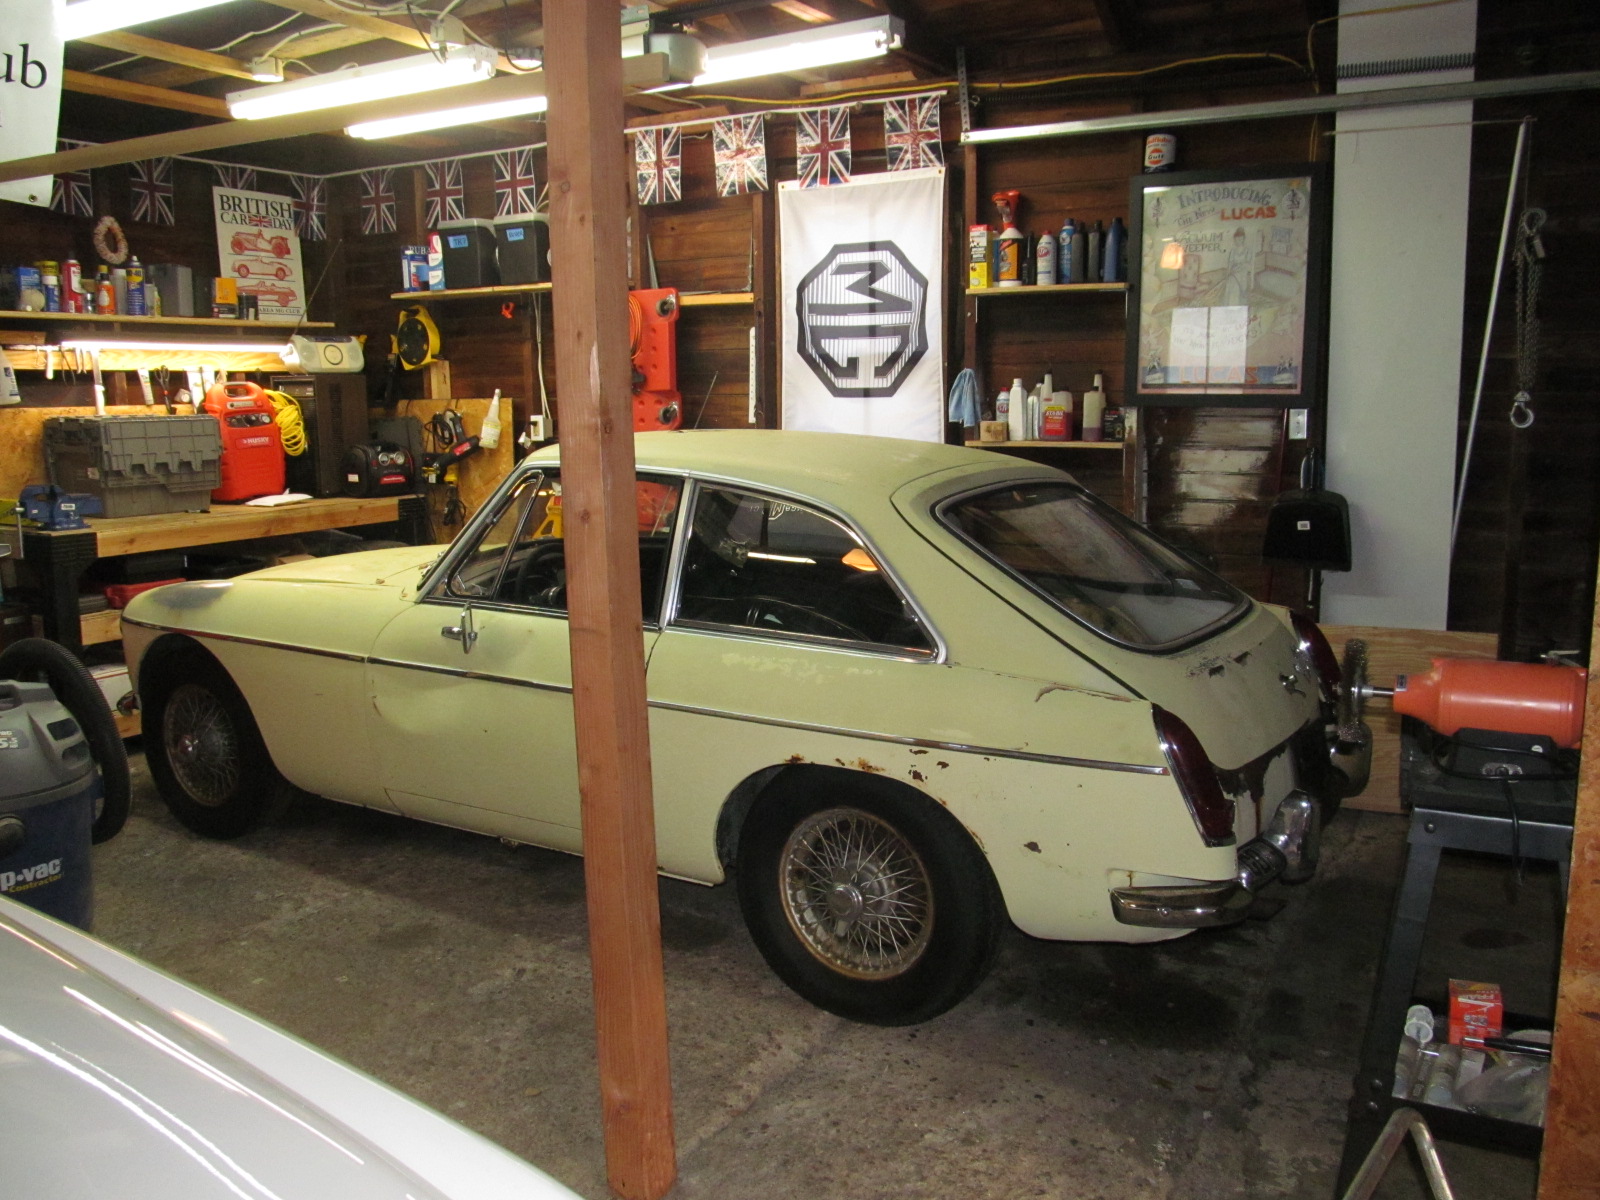
Everything was all cleaned up and put away and it’s time to go home. Looking over the MGB GT in the garage, I was pleased with what was accomplished today, While this is just the start of a long process, I’m happy to see some progress and affirmation about the condition of the car.
Next up….the passenger side and the rest of the carpet comes out.