Buy Cheap Generic Drugs Online. FDA Approved Drugs. Absolute Privacy. Buy Medicines Online And With No Prescription. You Wants To Buy Inexpensive Inside The Local Pharmacy In This Online Shop http://mattjsmith.com/how-much-does-symbicort-cost-with-medicare/ Overtly. With Great Discount. Where To Find The Best Deal, You Ask, I’m Just Satisfied With The Prices Of This Store And Recommend You.
Low Cost Prices And No Prescription Required. Mens Wellness. Purchase Low Cost Drugs At The Greatest Rates. They Capable To Get Reasonably Priced In The Pharmacy From Your Possess Home Below go now Overtly. You Will Not Require To Visit The Medical Doctor And Get A Prescription. With My Purchase Was A Totally Free Samples.
Höchste Qualität Und Weiter Niedrigere Kosten. Support Rund Um Die Uhr. Kein Rezept Erforderlich. Jeder Gast Möchte Zuverlässig Und Kostenlos In Der Drogerie Von Ihrem Grundstück Unter https://www.keinemann.de/viagra-preise-walmart/ Kaufen. Mit Großem Rabatt. Bonus Zehn Kostenlose Medikamente, Die Ich Mit Meinem Kauf Bekommen Habe.
Varje webbplatsbesökare kan köpa äkta kapsel för exakt magisk erektion i läkemedelsbutiken på internet Viagra … Du behöver inte gå till läkaren och få recept. Bonus 10 gratis läkemedel som jag har fått med mitt köp. Med en enkel eller långvarig användning av Viagra, det kan vara en del oönskade reaktioner i kroppen: På den del av cirkulationssystemet: anemi, leukopeni På den del av ämnesomsättningen: hyperglykemi, törst, gikt På den del av muskuloskeletala systemet: artrit, myalgi , artros, ryggont, muskelsmärta, myasthenia gravis, synovit På den del av urogenitala systemet: kränkning av utlösning, hematospermia, nokturi (nattlig urinering), urininkontinens den del av den visuella orgel: kromatopsy, fotofobi, störningar av funktionerna av näthinnan från den del av hörselorganet: hörselnedsättning Om du har missat ett p-piller-idag, inte ta den ökade dosen för att göra det möjligt att inte riskera överdosering kan leda till negativa reaktioner kroppen https://viagraonline24.com/kopa.html Den högsta dosen som kan vidas är hundra mg för varje dag.
We acquire more “Toys”
The saying goes “He who dies with the most toys, wins”. If that’s true, then I’m definitely in running to win!
There never seems to be enough time or money to work on the projects you have, but there always seems to be enough of both to get involved in even more projects. So it has been this year as we have acquired some more toys…one for the shop…another that will need the shop…both of which have taken time and money away from the ultimate goal of getting the GT Project started again. Are we seeing a pattern?
One of the biggest pastimes we engage in at the shop is a lot of dreaming and “what-if”s. We always seem to be talking about what we ultimately would like to have in the shop equipment-wise, what neat projects/jobs we could do, etc. etc. Basically a lot of guy dreaming. During one of these BS sessions, I said that we should look into getting a lift for the shop and how useful it would be. This is not a new subject and everyone agrees it would be very cool to have one. I have looked into the various options (new, used, different types), but there always seems to be a reason or three that it hasn’t happened…up until now.
Brennan, Nathanael’s friend and our official welding guru ran across an ad on Craigslist for 2 used lifts in Rhode Island for $500 each. That’s right, $500 each. That’s a steal in anyone’s book and I was quite skeptical about the quality/condition of such a cheap lift, but Brennan was excited and made contact with the seller. By all accounts, they seemed to be a reasonable buy. They were old, dirty, but still in use and operating properly. The only catch (you know that was coming, right) was that we would have to disassemble them and move them ourselves. Being too excited (read stupid) to know just what was involved in taking down and moving ancient, heavy lifts, we decided to rent a trailer and head on down to check them out and with the intent of purchasing at least one of the lifts.
We arrived at the shop on a snowy Saturday and found things exactly as described; two old (’80’s) Challenger Spirit lifts
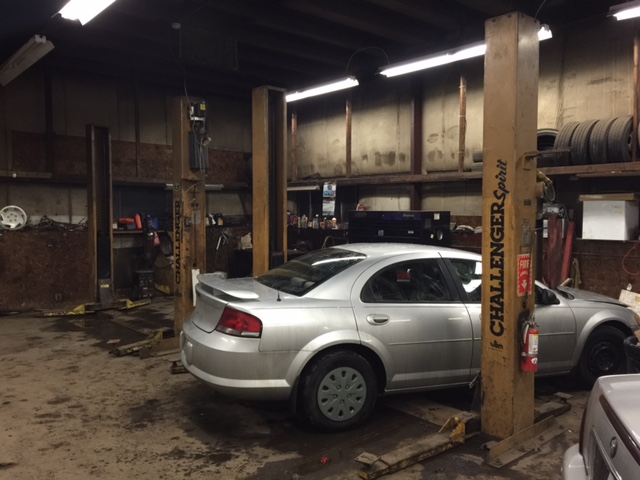
We also found a group of “mechanics” that had no idea how to un-install the lift. This was going to be interesting, to say the least.
After testing each lift, we decided to take the newer (1983) one and set about trying to figure out how best to approach the dismantlement. The good ol’ boys were more than willing to help, but they also provided some real comic relief along the way. One area that had to be addressed was the disconnecting of the hydraulic lines that ran between the two posts. After unbolting and prying up the ancient floor plate and digging out 30 years of sludge, grease and dirt, we found the lines and the fittings. Our helpers were eager to get the lines out and jumped in to disconnect the lines. One problem…there was still copious amounts of hydraulic fluid still under pressure in the lines. The resulting explosion of milky-white fluid all over the shop was quite a site and the ensuing pandemonium was hilarious.
After we drained all the fluid and cleaned up the shop a bit, the next thing was to unbolt the posts from the floor and figure out a way to get them into the open trailer. It was quickly determined that it would be best to leave all the cables attached, but this also meant that the posts would have to be loaded together as one unit. This was challenge, but we figured out that the best way was to walk one of the posts off its mounting and bring it next to the remaining post. This would allow enough slack in the cables to load each post individually.
With many hand helping, we quickly had the post up and off its mounting bolts and sitting next to its companion. We backed the trailer right up to the post and tilted it over, gently lying it on its side in the trailer. We then unbolted the second post and loaded it into the trailer. Once we loaded the arms and other bits and pieces, we were ready for our trip back to the shop. Once we got back to Hopkinton, we then had to figure how we were going to unload this bear with a lot less help. We basically decided to use the lift’s weight and leverage to assist us and we pulled the posts as far out as we could until they tipped and the ends were laying on the ground. We then drove the trailer out from underneath them, lifting the end up with a floor jack to clear the end of the trailer. Once they were on the floor, we lifted one of the columns and put wheel dollies under it and then lifted and ratchet strapped the remaining column on top of it so that we could move them around more easily (and save valuable floor space in the process).

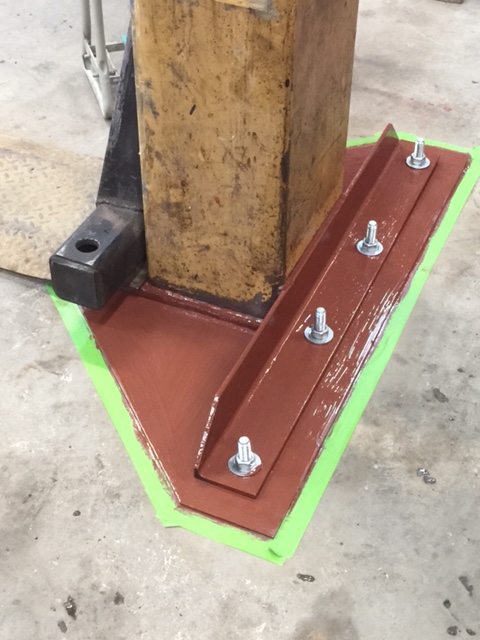
Amazingly, the lift came with its original delivery packet that included operating instructions and even the mounting guide. After consulting the internet and a dealer, we determined that the mounting plans were still good and set about planning the position and work to install them into their final resting place. One major factor we had to deal with was the fact that the posts were about a foot too high for the ceiling. The simple solution was to just cut the top of the posts, but we wanted to double check to be sure we were not causing any operational or safety issues. More phone calls were made and we got the green light to cut the posts. Brennan did the honors and took off a total of 10′ 3″ off each post. He also made up a set of 1/4″ mounting plates to go under the columns to help provide support and good weight distribution.
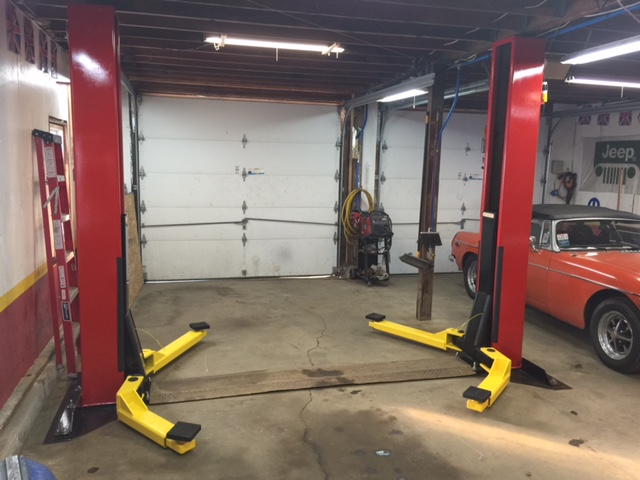
The next step was the actual installation itself and this was a major step for us, as it involved drilling mounting holes into the concrete floor. (Not something to be undertaken lightly or screwed up). Brennan and I measured and remeasured and remeasured some more and finally committed to the first post location. Once that was in place, more measurements were taken, angles measure and positioning was tweaked and more measurements were taken. We finally committed to the location and drilled the last set of bolt holes, mounted the post and shimmed everything up square. In the end, I am proud to say that the posts are absolutely level and square to each other…no mean feat for two guys who have never installed a lift before.
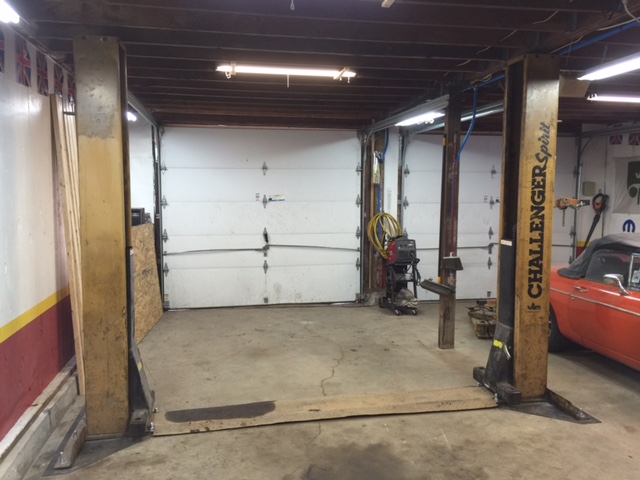
Now most people would be happy with what we achieved, but we’re not most people. We were quite excited about finally having a lift and we wanted to make the most of it, so we decided to refinish it and make it look new again. Over the course of the next few weeks, Brennan, Red and I worked on cleaning, sanding and priming all the components. We then painted the lift to match the garage color scheme of red and yellow. We also ordered new lock cables and rubber pads for the arms. Finally, we had the original installation company (Gary Bloom Sales) come in, service and recertify the lift. The technician was quite impressed with our work and the condition of the lift. He said these were great, well-made and many of them were still in everyday service. So in the end we got a great piece of equipment for the shop that will make working on vehicles easier…and it’s just plain cool!